
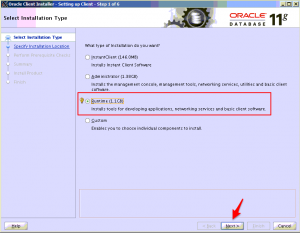
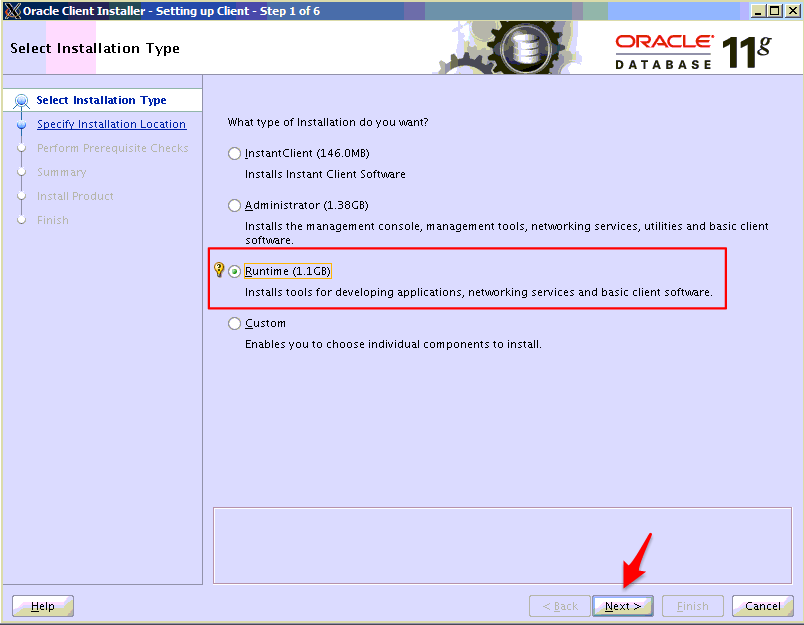
For the Cognos part of IBM Connections together with an Oracle database you need to install the 32-bit Oracle database client on your Cognos node. Cognos is only supporting the “Runtime-Client” and not the smaller “InstantClient”, so make sure you choose the right one.
Below I describe the steps how to install the client on your Cognos node:
Assumptions:
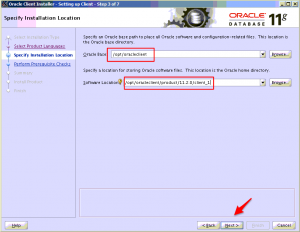
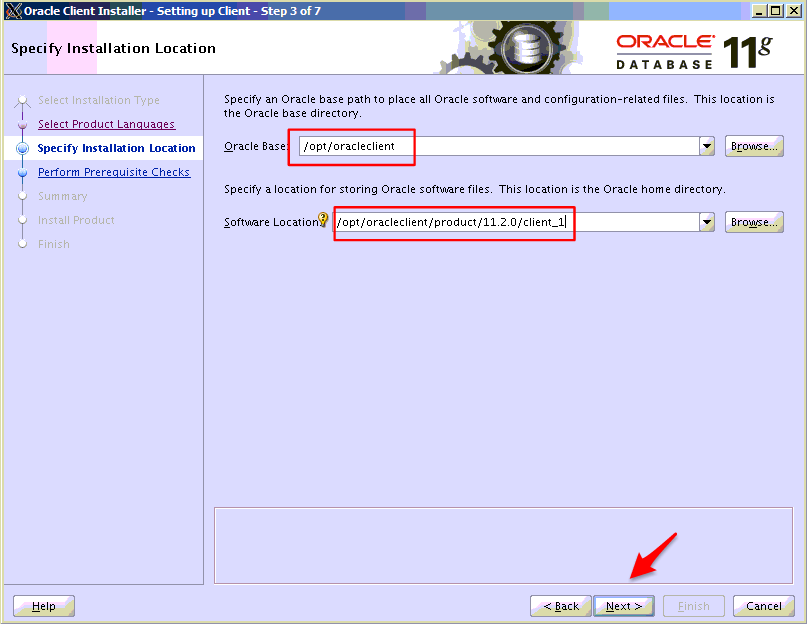
Path where to install the client: “/opt/oracleclient”
Linux user for the Oracle client (cannot be installed as root!): oraleclient
- Create a new file “/etc/oraInst.loc” and add the following two lines:[codesyntax lang=”text”]
inventory_loc=/opt/oracleclient/app/oraInventory
inst_group=users
[/codesyntax]
- Due to a bug in the Oracle client installer you need to remove all lines starting with “#” (comments) from the file /etc/services. Before you should create a backup copy of that file. You can do that with the following commands:[codesyntax lang=”bash”]
cp /etc/services /etc/services.OLD
sed -i '/^#/d' /etc/services
[/codesyntax]
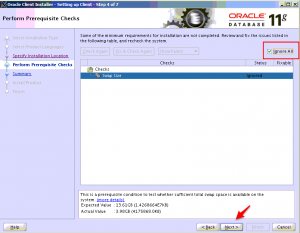
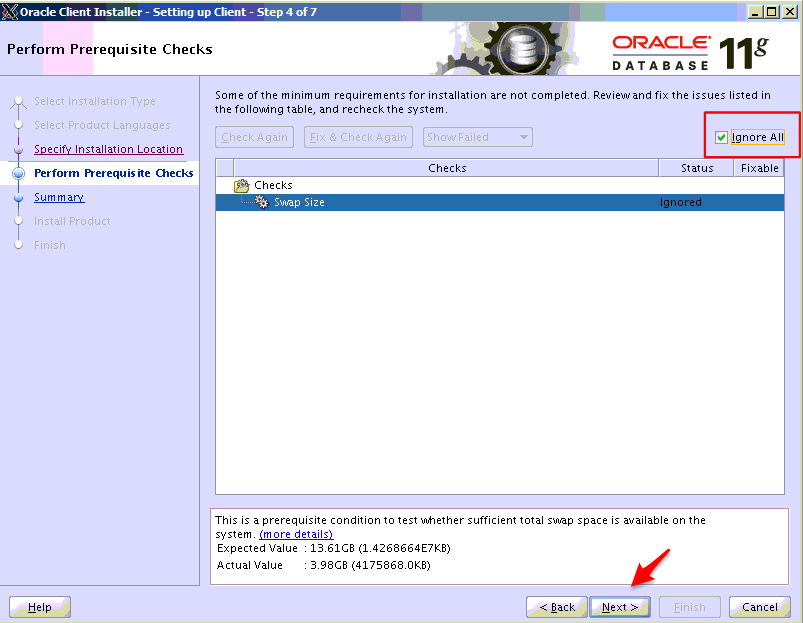
If you do not do that, then the installation program might hang at about 60% during “Copying files for ‘Oracle Notification Service'” (at least this was the case for me with SuSE Enterprise Linux (SLES) Version 11)
- Now login to the Linux machine as the user “oracleclient”
- Go to the Oracle client install directory and run the installer:cd /opt/INSTALL/Oracle/client
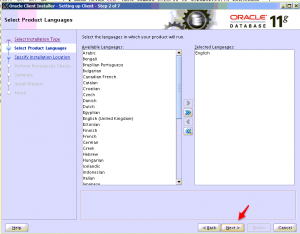
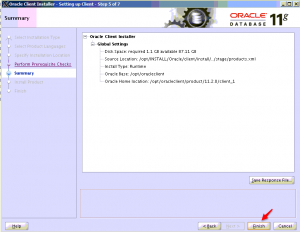
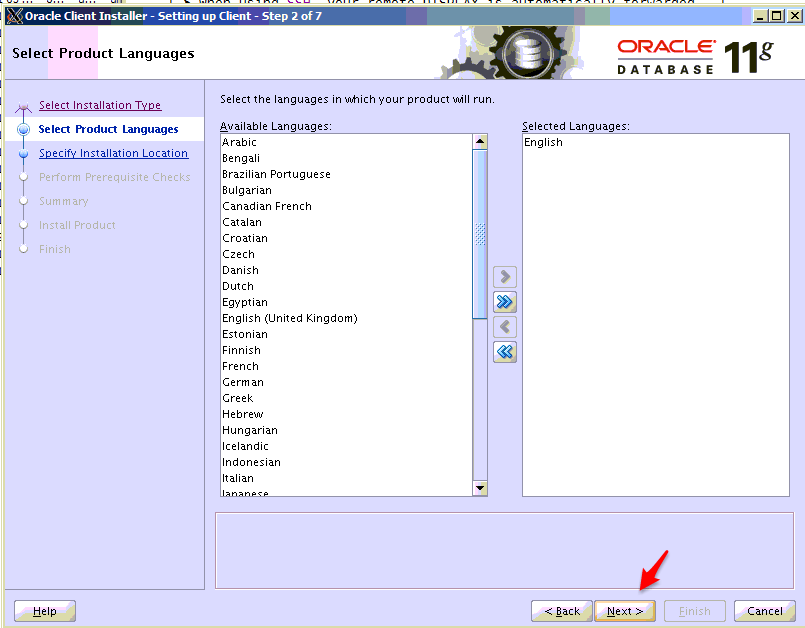
./runInstaller - Now follow the instructions in the Screenshots:

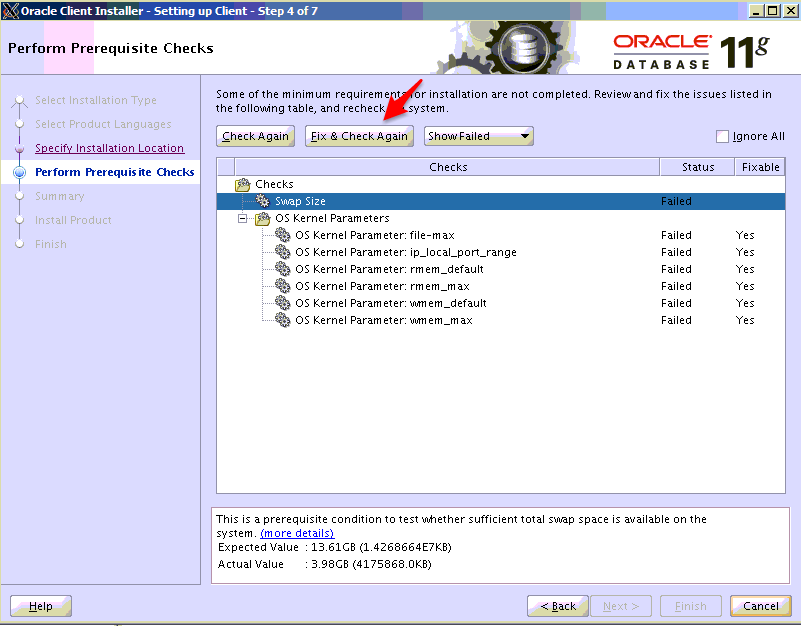
- An automated script is created to fix the issues. Open a second connection to the Linux machine as user “root” and run that script before you continue with the installation:
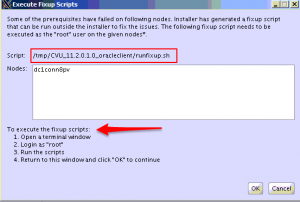
[codesyntax lang=”bash”]
cd /tmp/CVU_11.2.0.1.0_oracleclient/
./runfixup.sh
[/codesyntax]
Result is something similar like that:
[codesyntax lang=”text”]
Response file being used is :./fixup.response
Enable file being used is :./fixup.enable
Log file location: ./orarun.log
Setting Kernel Parameters...
fs.file-max = 8192
fs.file-max = 6815744
net.ipv4.ip_local_port_range = 9000 65500
net.core.rmem_default = 262144
net.core.wmem_default = 262144
net.core.rmem_max = 4194304
net.core.wmem_max = 1048576
[/codesyntax]
After the scripts has been run click “OK” and then continue with the installation program.
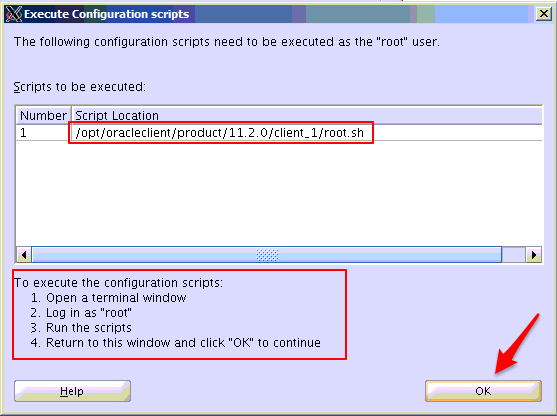
During the installation of the client a new window will pop up:
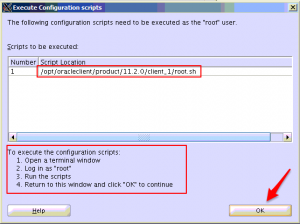
You need again to open a second command line window as user “root” and run the script mentioned in that window:
[codesyntax lang=”bash”]
/opt/oracleclient/product/11.2.0/client_1/root.sh
[/codesyntax]
The script is asking for the full pathname of the local bin directory. Just type ENTER to use the default value of “/usr/local/bin”.
The output is something similar like that:
[codesyntax lang=”text”]
Running Oracle 11g root.sh script...

The following environment variables are set as:
    ORACLE_OWNER= oracleclient
    ORACLE_HOME=  /opt/oracleclient/product/11.2.0/client_1

Enter the full pathname of the local bin directory: [/usr/local/bin]:
   Copying dbhome to /usr/local/bin ...
   Copying oraenv to /usr/local/bin ...
   Copying coraenv to /usr/local/bin ...


Creating /etc/oratab file...
Entries will be added to the /etc/oratab file as needed by
Database Configuration Assistant when a database is created
Finished running generic part of root.sh script.
Now product-specific root actions will be performed.
[/codesyntax]
- Now click OK and continue with the installation program.
- Add the following lines to “/home/oracleclient/.profile” and also to the file “/root/.profile” (make sure to match you path name for the IBM Cognos installation ,the Oracle database client installation and the Linux user name you used for installation!):[codesyntax lang=”bash”]
export ORACLE_OWNER=oracleclient
export ORACLE_HOME=/opt/oracleclient/product/11.2.0/client_1
export PATH=$ORACLE_HOME/bin:$PATH
export LD_LIBRARY_PATH=/opt/IBM/Cognos/CognosBI/bin64:$ORACLE_HOME/lib:$LD_LIBRARY_PATH
export TNS_ADMIN=$ORACLE_HOME/network/admin
[/codesyntax]
- Create the file “/opt/oracleclient/product/11.2.0/client_1/network/admin/tnsnames.ora” and add the following lines:
Caution: Use the correct HOST and PORT for your environment!!!!
“conn50_db” is the alias name for your database connection. If you use a different name you need to use that name also in the SQLPLUS command below![codesyntax lang=”text”]conn50_db = (DESCRIPTION = (ADDRESS_LIST = (ADDRESS = (PROTOCOL = TCP)(HOST = <db server hostname>)(PORT = <db server port>)) ) (CONNECT_DATA = (SERVICE_NAME = CONN50P) ) )
[/codesyntax]
- Log off of all sessions and login as “root” again (to activate the .profile changes)
- Check if the installation has been successful by running the following command:[codesyntax lang=”bash”]
sqlplus metricsuser/[password for metricsuser]@[alias you defined above, like CONN50_DB]
[/codesyntax]
The output should look like that:
[codesyntax lang=”text”]
SQL*Plus: Release 11.2.0.1.0 Production on Fri Dec 12 09:21:08 2014

Copyright (c) 1982, 2009, Oracle.  All rights reserved.

Connected to:
Oracle Database 11g Enterprise Edition Release 11.2.0.4.0 - 64bit Production

SQL>
[/codesyntax]
- From the SQL prompt run the following command to check if you arealeto access the METRICS tables:[codesyntax lang=”sql”]
SELECT table_name FROM all_tables WHERE owner = 'METRICS';
[/codesyntax]
You should see all tables with owner name “METRICS” be listed:
[codesyntax lang=”text”]
TABLE_NAME
------------------------------
D_SOURCE
D_EVENT_OP
D_SCOPE
D_ITEM_TYPE
D_MISC
D_COMMUNITY
F_TRX_USERS
EVT_DETAIL_MAPPING
D_EVT_RANKING
CONTAINER_ITEM_DETAIL
ITEM_EVT_WEIGHT

TABLE_NAME
------------------------------
USER_EVT_WEIGHT
D_TIME_RANGE
F_USER_EVENT_COUNT
PRODUCT
SCHEDULERTREG
SCHEDULERTASK
SCHEDULERLMGR
F_TRX_ITEMS
F_TRX_EVENTS
F_TOP_RANKING_DETAIL
USER_LOGIN

TABLE_NAME
------------------------------
SCHEDULERLMPR
F_ITEM_EVENT_COUNT
COMMUNITY_WIDGETS

25 rows selected.

Enter "QUIT" fo leave the SQLPLUS prompt.
[/codesyntax]
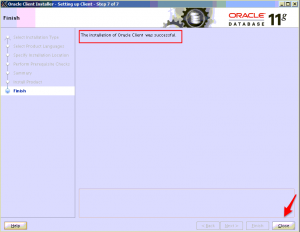
- Now you have finished the installation of the Oracle database client.

Thanks Michael! Everything works as described here, except “sqlplus metricsuser/@” this must be “sqlplus metricsuser/@conn50_db” or different SID like set within tnsnames.ora.
Ups sorry command must be sqlplus metricsuser/password@SID or metricsuser/password@conn50_db
Thanks a lot. It was correct before WordPress deleted everything after a “lower than” character 🙁 Just corrected it and now it should be ok again.