By default Jitsi Meet is open for everyone. So everyone can just put in a name for a conference room and start a conference. As my Jitsi Meet instance is not running on a dedicated server but shares the server with other important functions like DNS, mail etc., I do not want that everyone is using Jitsi without my permission.
So I needed to add some kind of authentication to Jitsi which means, that only certain authenticated users can start a conference. Once started everyone then can join the conference without further authentication just like before.
The steps to provide that, are documented in this article under the subject “Secure domain”.
I just followed the steps 1 to 4 and it worked fine afterwards.
Just to know: The additional virtual host which you need to create in Prosody (in the example named “guest.jitsi-meet.example.com” is only existing internally so you do NOT need to create that hostname in your DNS.
Now if someone enters a conference room, Jitsi tells the user to wait until the conference has been started or, if you are owner, to open the conference by entering your Prosody user and password.
As soon as the conference room has been opened, all other clients can just join the conference. The room is then available until the last participant is leaving the room. During that time, all users can enter without authentication.
I installed a Jitsi Meet instance on my virtual server this weekend. Although it was quite easy by following the Quick Install Guide there were some things which did not work in my environment:
Apache Integration
I have en existing Apache server running on my machine. Although the installation script should automatically recognize Apache and configure it for Jitsi, this did not work for me.
After the installation nothing changed in my Apache configuration. so I needed to create a new virtual server instance for my Jitsi server URL. There is a template on Github which you can use as example. Do not forget to change “/etc/jitsi/meet/jitsi-meet.example.com-config.js” so that it is matching the correct path in your environment (depending on the hostname of your server).
Prosody Integration
I also had already a Prosody XMPP server running on my machine, which is also used by Jitsi.
For my existing server I had a config file called “/etc/prosody/prosody.cfg.lua” which included already a statement “plugin_paths = { … }” to tell prosody where to find its plugins.
Jitsi added an additional Prosody config file in “/etc/prosody/conf.avail/<your hostname>.cfg.lua” which also included such a statement. This seems to have overruled my existing statement so that my plugins could no longer be found after restarting Prosody.
So I commented out the statement in the new file and added the Jitsi plugin path to my existing config file.
Connection Error
In the log file “/var/log/jitsi/jicofo.log” there were many errors like
The reason for that was, that my existing Prosody server did only listening to its external IPv4 and IPv6 address but not on “localhost”. To solve that I just removed the line “c2s_interfaces=” from my Prosody config file and restarted Prosody. It now listens on all interfaces including “localhost” and the error disappeared.
After doing Jitsi Meet did work fine.
If you are using Jitsi you should be aware that there currently is a problem with the current version of Firefox which leads to sometimes bad video / sound quality. So it is recommended to either use a Chromium-based browser of the Jitsi app which is available for Windows, Mac, Linux, iOs and Android.
Falls jemand für sein Smart Home schaltbare Wifi-Steckdosen sucht, die keine China-Cloud benötigen und per MQTT ansteuerbar sind (z.B. für die Integration in FHEM, OpenHAB etc.):
Man benötigt allerdings einen Linux-Rechner mit einem Wifi-Adapter der als Access Point fungieren kann. Ich habe hierzu einen Raspberry Pi mit dem internen Wifi-Adapter und einem fabrik-frischen Debian Buster genutzt.
Danach man die Steckdosen, wie alle Geräte mit Tasmota, per Web oder MQTT in sein Smart Home integrieren.
Die Steckdosen ersetzen bei mir die letzten Funksteckdosen im 432 MHz-Bereich, die einfach nicht verlässlich geschaltet hatten und die vor allem auch keinen Rückkanal haben. Man kann also nicht erkennen, ob der Schaltbefehl auch erfolgreich war. Mit Tasmota geht das.
Wer solche Steckdosen benötigt sollte schnell zugreifen. Es kann natürlich immer sein, dass der Hersteller, die Lücke, die für das over-the-air-Flashen benötigt wird, in einer neuen Firmware-Version schließt.
I just had the issue that Virtualbox showed me two network adapters if I choose to create a bridged network. However, both network adapters were no longer existing and with none of the normal Windows commands you were able to see and delete these adapters.
Even searching the registry for the adapter names did not get a result back.
To train the Bayes recognition of Spamassassin you need to have a big amount of spam mails which you can feed to Spamassassin. Normally you would not have such amount of spam if you are just running your personal mailserver.
Just download the archives you want (I recommend just to use newer archives e.g. from the last 2 years) and then run the “sa-learn” command of Spamassassin. I did it like that:
1
2
3
4
5
6
7
8
9
10
11
12
13
14
15
16
17
18
19
cd/tmp
mkdir spam
cd spam
# Download the Archives
wget http://untroubled.org/spam/2018.7z
wget http://untroubled.org/spam/2019-01.7z
# ... <as much archives you want ...>
# Unpack the archives (you need to have 7z installed!) and
<backup user>: User on NAS with permissions to use rsync to the target share
<synology host>: Hostname / IP of your Synology NAS device (if it is located remote you need to make sure that it is reachable via port 873/TCP
<synology file share>: The name of the target file share on your Synology host where you want to backup the data
In the file “/root/rsync_pass” you store the rsync password of the user <backup user>. Make sure to restrict permissions of that file (“chmod 600 /root/rsync_pass”)
This commands synchronizes the directories included in the “{}” brackets including the complete filename. Deleted files in the source will be deleted in the target as well, so that you do have an exact copy of your source.
To restore files you can use the following command (Example: Restore “/etc/” with all subfolders into the target directory “/restore“:
Unfortunately this will preserve the file and directory permissions but not the original owner of the directory/file. This will work if you use another Linux server as your backup device but I have not found a solution for a Synology NAS device.
I just needed to migrate all mails from a Google mail account to a Dovecot IMAP server. I did this with a tool called “Imapsync“.
I just wanted to synchronize all mails from the Google sent mail folder to the “Sent” folder of Dovecot and all mails from the Google “All Mails” view to a folder called “Archive” of the Dovecot account.
You need to make sure that you synchronize the “Sent” mails first as these are also included in the “All Mails” view and otherwise will not be added to the “Sent ” folder in addition.
This is the command I used for the migration:
1
2
3
4
5
6
7
8
9
10
11
./imapsync\
--user1<google mail user>--password1<google mail user password>\
--host2<dovecot hostname>\
--user2<dovecot mail user>--password2<dovecot mail user password>\
With the “–exclude” option you can specify which folders should not me synchronized. I excluded the Inbox as I just wanted to sync all mails to the “Archive” folder of my Dovecot account.
The “–folderlast” option makes sure that the “All Mails” folder of Google will be synchronized at the end, after all other folders have been synchronized.
With the “–regextrans2” options you can specify which source folder name should be synchronized to what target folder name. You need to adapt that in order to match your environment!
This is a real sync so you can have already mails in your target Dovecot account before which will not be deleted. And you can run this command several times and it will just only synchronize the mails which have changed on the Google mail account in the meantime.
Steve Gibson, the man who coined the term spyware and created the first anti-spyware program, creator of Spinrite and ShieldsUP, discusses the hot topics in security today with Leo Laporte.
Hallo, wir sind Daniel, ein Ex-Berliner, und Albert, ein Rheinländer, der zumindest eine Patentante in Berlin hat. Wir haben festgestellt, dass zumindest der erste Teil des Hauptstadt-Mottos “Arm aber sexy” für uns nur begrenzten Charme hat. Deshalb haben wir beschlossen, uns selbst um unser Geld zu kümmern. Dabei sind wir mehr als einmal auf die Nase gefallen, aber jetzt haben wir unsere Finanzen ganz gut im Griff. Über diesen Weg sprechen wir im Podcast. Was hat sich bewährt, was nicht. Welche Klippen gilt es zu umschiffen. Unser Versprechen: Wir plaudern nett über das Thema Finanzen. Du wirst eine Menge lernen, aber es wird auch lustig.
In diesem Podcast geht Katharina Nocun (kattascha) aktuellen politischen Debatten auf den Grund. Gemeinsam mit Experten nimmt sie Argumente und Fakten auseinander. Dieser Podcast ist ein Denkangebot für alle, die sich gerne tiefer in ein Thema einarbeiten.
Der Podcast zur sicherheitspolitischen Lage in Deutschland, Europa und der Welt. | Die Welt um Deutschland herum ist im Umbruch. Die Zeiten sind vorbei, in denen die Bundesrepublik sich im Bereich der Sicherheit uneingeschränkt auf andere verlassen konnte. Deutschland ist in der Sicherheits- und Verteidigungspolitik gefordert. Doch die deutsche sicherheitspolitische Debatte lässt weiterhin zu wünschen übrig. „Sicherheitshalber“ schafft Abhilfe. | Hier diskutieren Ulrike Franke (European Council on Foreign Relations), Carlo Masala (Universität der Bundeswehr München), Frank Sauer (Universität der Bundeswehr München), und Thomas Wiegold (augengeradeaus.net) die aktuellen Entwicklungen in der deutschen Sicherheits- und Verteidigungspolitik und die Lage in Europa und der Welt.
As I own quite a couple of Apple things, I was looking for a solution to charge all things with little effort and without having too much cables laying around.
I found this wireless charging station from SIMPFUN which let me charge my iPhone, my Apple Watch and my Airpods at the same time with only needing one cable. You can get it in three different colours: White, Grey and Black. An USB-C adapter is also included, so you do not need anything else to charge all devices.
Phone and watch will be charged wireless and for the Airpods there is a Lightning connector at the top where you just put the the Airpod case on.
You can use the nightstand mode of your Apple watch during charging so that you can use it as alarm clock as well.
The only weak point I found so far: The charging station does have a small blue light while charging, which I find too bright in the night. So I put a small sticky tape over it. It is still slightly visible because it does shine through the bottom of the stand but it is no longer disturbing in the night.
For travelling I also found a solution to charge all three devices at the same time with only one cable, the Saiwill 3 in 1 Cable. It gives me two lighting cables for iPhone, Airpods or iPad and also a cable to charge the Apple Watch. On the other side there is one USB-A connector.
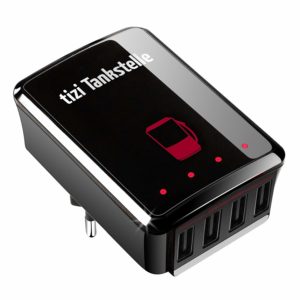
So I do only need one cable and a charger like e.g. the Equinux Tizi Tankstelle to charge all my devices while I am travelling.
By the way: If you do also have additional devices which need to be charged via USB-C or Micro-USB, I can recommend the Equinux tizi Schlitzohr which is a combined USB-C, Lightning and Micro-USB cable with an USB-A connector at the other end.
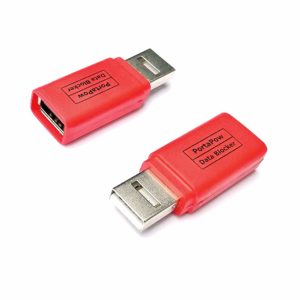
One more thing: If you charge your phones sometimes on public charging stations like e.g. at airports I recommend to use this adapter on your cable.
This adapter will prevent your device to switch to data transfer mode, so you won’t risk data theft or computer viruses if you charge your device at a foreign USB port e.g. at an airport etc.